Nginx (pronounced Engine-X) is a russian open source httpd server originally written by Igor Sysoev back in 2005. Nginx is a very light weight httpd server and reverse proxy. It is estimated that approx. 3 per cent of all web servers run nginx. In Russia the number is as high as 20 percent, including some of their biggest web sites. Nginx is also used by Wordpress.com and 4chan.
Why use Nginx instead of Apache or Lighty? Nginx should be fast. I mean FAST. Fast in a way of over 10000 concurrent requests / sec per server. Now that's fast!
I have wanted to screw 'round with Nginx for a while, so here goes nothing!
How to install Nginx on your Linux box
Nginx can be downloaded from www.nginx.net. Simple web page displays the latest distribution packages and small introduction. Further instructions can be found from Nginx Wiki.
I installed Nginx on my CentOs 5.1 running on VMWare & Macbook. Nginx's version was 0.6.32. The default installation is very straightforward - configure, make & make install. I had to install pcre packages to my box before installing httpd server in order to enable rewrite module. I also used --prefix module to install application where i wanted:
[root@cluster1 nginx-0.6.32]# ./configure --prefix=/opt/nginx-0.6.32
[root@cluster1 nginx-0.6.32]# make
[root@cluster1 nginx-0.6.32]# make install
After this Nginx is ready to serve static files!
How to configure Nginx
When you move to your Nginx installation directory, here's what you see:
drwxr-xr-x 2 root root 4096 Oct 5 23:52 sbin
drwxr-xr-x 2 root root 4096 Oct 5 23:52 html
drwxr-xr-x 2 root root 4096 Oct 5 23:52 conf
Sbin directory has only nginx executable file which starts up httpd. Html directory is same as htdocs directory in Apache - copy your files here in order to serve 'em to the world! Conf-file has all configuration files.
When you start up your nginx (just go to sbin and type ./nginx in order to start your web server!) you get few more directories:
drwx------ 2 nobody root 4096 Oct 5 23:52 proxy_temp
drwxr-xr-x 2 root root 4096 Oct 5 23:52 logs
drwx------ 2 nobody root 4096 Oct 5 23:52 fastcgi_temp
drwx------ 2 nobody root 4096 Oct 5 23:52 client_body_temp
In the conf-directory you can see the following files:
-rw-r--r-- 1 root root 3610 Oct 5 23:52 win-utf
-rw-r--r-- 1 root root 2726 Oct 5 23:52 nginx.conf.default
-rw-r--r-- 1 root root 2726 Oct 5 23:52 nginx.conf
-rw-r--r-- 1 root root 2991 Oct 5 23:52 mime.types.default
-rw-r--r-- 1 root root 2991 Oct 5 23:52 mime.types
-rw-r--r-- 1 root root 2223 Oct 5 23:52 koi-win
-rw-r--r-- 1 root root 2837 Oct 5 23:52 koi-utf
-rw-r--r-- 1 root root 909 Oct 5 23:52 fastcgi_params.default
-rw-r--r-- 1 root root 909 Oct 5 23:52 fastcgi_params
The most important file of them all is of course nginx.conf. The default configuration looks like this after installation:
#user nobody;
worker_processes 1;
#error_log logs/error.log;
#error_log logs/error.log notice;
#error_log logs/error.log info;
#pid logs/nginx.pid;
events {
worker_connections 1024;
}
These are default configuration parameters to set user and logging preferences. If you are your box to run many different applications it is a good idea to change default user to something else, like "nginx" or "www_user".
Worker_connections parameter sets the maximum number of connections each worker can handle. This is quite good default value.
The following part defines base settings for the http access:
http {
include mime.types;
default_type application/octet-stream;
You should not tamper round with mime types because you will likely end up with screwed up web server!
If you want to, you can also change default log format in the following part.
#log_format main '$remote_addr - $remote_user [$time_local] $request '
# '"$status" $body_bytes_sent "$http_referer" '
# '"$http_user_agent" "$http_x_forwarded_for"';
#access_log logs/access.log main;
TCP nopush setting means that HTTP response hearders are all sent in one packet. Sendfile setting means that Nginx ignores the details of the file it is sending and uses kernel sendfile support instead. Keepalive setting defines how long server waits for users packets. This should be changed only to few seconds on busy sites. Gzip compression saves bandwith on site, depending what kind of packets server is sending.
sendfile on;
#tcp_nopush on;
#keepalive_timeout 0;
keepalive_timeout 65;
#gzip on;
The following server part is just like server settings on Apache HTTPD and if you have tampered 'round with Apache before this is quite straightforward to you.
server {
listen 80;
server_name localhost;
#charset koi8-r;
#access_log logs/host.access.log main;
location / {
root html;
index index.html index.htm;
}
#error_page 404 /404.html;
# redirect server error pages to the static page /50x.html
#
error_page 500 502 503 504 /50x.html;
location = /50x.html {
root html;
}
Example how to configure virtual host on Nginx:
# another virtual host using mix of IP-, name-, and port-based configuration
#
#server {
# listen 8000;
# listen somename:8080;
# server_name somename alias another.alias;
# location / {
# root html;
# index index.html index.htm;
# }
#}
These were basic examples of Nginx and what one can do with it. I stripped some configuration examples but here you can see the basics. Later we're going to configure Nginx to use PHP and we're going thru how to use mod_rewrite with Nginx.
Sunday, October 5, 2008

Benchmarking Apache 2 vs. Lighttpd
Have you ever wondered which is faster, Apache 2 or Lighttpd? Everyone says that Lighttpd (or lighty) is a much faster, but is it really so?
I found this curious article I'd like to share with you. It can be originally be found here but I'm also going to write a short version about the article below:
The benchmark shows how Apache 2.2.3 compares to Lighttpd 1.4.13 when delivering static HTML file approx 50 kilobytes. Test was made with Apache benchmark.
The test was made on a Debian Etch running inside VMware. The box was quite old but it shouldn't affect on the tendency.
Versions were:
*Apache 2.2.3 mpm-prefork with default Debian configuration.
*Lighttpd 1.4.13 with default Debian configuration.
The HTML file was approx 50 kilobytes in size and it was saved as test.html.
I've run the following commands ten times each and calculated the average requests per second that the web server could handle:
*ab -n 100 -c 5 http://localhost/test.html
*ab -n 1000 -c 5 http://localhost/test.html
*ab -n 10000 -c 5 http://localhost/test.html
*ab -n 100 -c 50 http://localhost/test.html
*ab -n 1000 -c 50 http://localhost/test.html
*ab -n 10000 -c 50 http://localhost/test.html
*ab -n 100 -c 100 http://localhost/test.html
*ab -n 1000 -c 100 http://localhost/test.html
*ab -n 10000 -c 100 http://localhost/test.html
-n is the number of requests to perform for the benchmarking session; -c is the number of multiple requests to perform at a time.
Here's result of the test:

As you can see, lighty is almost one third faster on static pages! Knowin this one has to consider if it is worth using lighty instead of Apache. Personally I choose Apache? Why? More modules and knowledge. Maybe some day I'll start using Lighty. Or Nginx. Woudln't that be kewl?
I found this curious article I'd like to share with you. It can be originally be found here but I'm also going to write a short version about the article below:
The benchmark shows how Apache 2.2.3 compares to Lighttpd 1.4.13 when delivering static HTML file approx 50 kilobytes. Test was made with Apache benchmark.
The test was made on a Debian Etch running inside VMware. The box was quite old but it shouldn't affect on the tendency.
Versions were:
*Apache 2.2.3 mpm-prefork with default Debian configuration.
*Lighttpd 1.4.13 with default Debian configuration.
The HTML file was approx 50 kilobytes in size and it was saved as test.html.
I've run the following commands ten times each and calculated the average requests per second that the web server could handle:
*ab -n 100 -c 5 http://localhost/test.html
*ab -n 1000 -c 5 http://localhost/test.html
*ab -n 10000 -c 5 http://localhost/test.html
*ab -n 100 -c 50 http://localhost/test.html
*ab -n 1000 -c 50 http://localhost/test.html
*ab -n 10000 -c 50 http://localhost/test.html
*ab -n 100 -c 100 http://localhost/test.html
*ab -n 1000 -c 100 http://localhost/test.html
*ab -n 10000 -c 100 http://localhost/test.html
-n is the number of requests to perform for the benchmarking session; -c is the number of multiple requests to perform at a time.
Here's result of the test:

As you can see, lighty is almost one third faster on static pages! Knowin this one has to consider if it is worth using lighty instead of Apache. Personally I choose Apache? Why? More modules and knowledge. Maybe some day I'll start using Lighty. Or Nginx. Woudln't that be kewl?
Tuesday, September 30, 2008
Basic Commands in UNIX
Here's a short list of basic commands in UNIX. I have copied the list originally from another page which I cannot remember and I did some editing to it.
Files
* ls --- lists your files
* ls -l --- lists your files in 'long format'
* ls -a --- lists all files
* more filename --- shows the first part of a file. Hit the space bar to see more or q to quit. You can use /pattern to search for a pattern.
* emacs filename --- is an editor that lets you create and edit a file.
* mv filename1 filename2 --- moves a file
* cp filename1 filename2 --- copies a file
* rm filename --- removes a file.
* diff filename1 filename2 --- compares files, and shows where they differ
* wc filename --- tells you how many lines, words, and characters there are in a file
* chmod options filename --- lets you change the read, write, and execute permissions on your files. For example, chmod 777 file
File Compression
* gzip filename --- compresses files, so that they take up much less space.
* gunzip filename --- uncompresses files compressed by gzip.
Directories
* mkdir dirname --- make a new directory
* cd dirname --- change directory.
* pwd --- tells you where you currently are.
Finding things
* grep string filename(s) --- looks for the string in the files. This can be useful a lot of purposes, e.g. finding the right file among many.
About your (electronic) self
* whoami --- returns your username.
* passwd --- lets you change your password.
* ps -u yourusername --- lists your processes.
Files
* ls --- lists your files
* ls -l --- lists your files in 'long format'
* ls -a --- lists all files
* more filename --- shows the first part of a file. Hit the space bar to see more or q to quit. You can use /pattern to search for a pattern.
* emacs filename --- is an editor that lets you create and edit a file.
* mv filename1 filename2 --- moves a file
* cp filename1 filename2 --- copies a file
* rm filename --- removes a file.
* diff filename1 filename2 --- compares files, and shows where they differ
* wc filename --- tells you how many lines, words, and characters there are in a file
* chmod options filename --- lets you change the read, write, and execute permissions on your files. For example, chmod 777 file
File Compression
* gzip filename --- compresses files, so that they take up much less space.
* gunzip filename --- uncompresses files compressed by gzip.
Directories
* mkdir dirname --- make a new directory
* cd dirname --- change directory.
* pwd --- tells you where you currently are.
Finding things
* grep string filename(s) --- looks for the string in the files. This can be useful a lot of purposes, e.g. finding the right file among many.
About your (electronic) self
* whoami --- returns your username.
* passwd --- lets you change your password.
* ps -u yourusername --- lists your processes.
How to restart linux
There are many ways to restart your linux computer.
If you are using GUI interface, shutting down or rebooting the computer depends of the GUI you are using. Usually shutdown, reboot etc. commands are located thru the GUI's main menu or bar located at the bottom of the screen.
If you are using shell window, the easiest way to restart linux is to use "reboot" command:
*Change to root user
*simpy type reboot and hit enter, and the computer restarts.
Hope this helps you linux newbies to restart linux :)
If you are using GUI interface, shutting down or rebooting the computer depends of the GUI you are using. Usually shutdown, reboot etc. commands are located thru the GUI's main menu or bar located at the bottom of the screen.
If you are using shell window, the easiest way to restart linux is to use "reboot" command:
*Change to root user
*simpy type reboot and hit enter, and the computer restarts.
Hope this helps you linux newbies to restart linux :)
How to install RPM
What is RPM?
Many Linux distributions use RPM as the default application management system. This means that when using RPM packages, it is quite easy to install applications to your favorite Linux distributions.
RPM is originally developed by Red Hat, but nowadays you can run into rpm in many other linux distributions (for example Fedora Core, CentOS, Mandriva or Yellow Dog Linux) and even on other operating systems (Novel Netware and IBM Aix).
RPM packaged software follows usually the following format:
(name)-(version)-(release).(arch).rpm
For example: httpd-2.23-2.i386.rpm
Also source codes can be downloaded in rpm packages. For example httpd-2.23-2.i386.src.rpm. RPM files with the noarch.rpm extension refer to files that don't depend on a computer's architecture.
Install RPM
Installing RPM package is very easy and straightforward:
* rpm -ivh package.rpm - installs package.rpm
* rpm -Uvh package.rpm - updates package.rpm
* rpm -qi package - displays (already installed ) information about application "package"
* rpm -qpi package.rpm - displays information about rpm-file
* rpm -qpl package.rpm - displays files included in package.rpm
* rpm -qa - lists all rpm packages installed to your distribution
* rpm --rebuilddb - rebuilds your rpm database
With these simple commands you can install rpm packages to your linux distribution!
Many Linux distributions use RPM as the default application management system. This means that when using RPM packages, it is quite easy to install applications to your favorite Linux distributions.
RPM is originally developed by Red Hat, but nowadays you can run into rpm in many other linux distributions (for example Fedora Core, CentOS, Mandriva or Yellow Dog Linux) and even on other operating systems (Novel Netware and IBM Aix).
RPM packaged software follows usually the following format:
(name)-(version)-(release).(arch).rpm
For example: httpd-2.23-2.i386.rpm
Also source codes can be downloaded in rpm packages. For example httpd-2.23-2.i386.src.rpm. RPM files with the noarch.rpm extension refer to files that don't depend on a computer's architecture.
Install RPM
Installing RPM package is very easy and straightforward:
* rpm -ivh package.rpm - installs package.rpm
* rpm -Uvh package.rpm - updates package.rpm
* rpm -qi package - displays (already installed ) information about application "package"
* rpm -qpi package.rpm - displays information about rpm-file
* rpm -qpl package.rpm - displays files included in package.rpm
* rpm -qa - lists all rpm packages installed to your distribution
* rpm --rebuilddb - rebuilds your rpm database
With these simple commands you can install rpm packages to your linux distribution!
Sunday, September 14, 2008
Secure linux server with fail2ban
I have written shortly about fail2ban earlier, but since fail2ban is so awesome application, I wanted to tell a little more about the application. It works like DenyHosts, which I am planning to test later.
Fail2ban is basically a tool that observers all login attempts to your server thru various services, like SSH, HTTPD, FTP, Telnet (oh god, no telnet, please!). If it finds failed login attempt many times in a row from the same IP / host, it blocks that IP / host with an iptables firewall rule. Handy piece of software, I say!
We're going to configure fail2ban to monitor SSH server, because I'm not using any other open service in my linux server. If you're using proftpd or some else server that requires authentication, it is quite easy to implement the changes to those servers, too!
1) Install fail2ban
Easiest way to install fail2ban is to use yum. As I have said before, it is easy to use yum and you win a lots of time when using it. If you know exactly what you're doing, go ahead and compile your own applications!
yum install fail2ban
Start fail2ban and create system startup links:
/etc/init.d/fail2ban start
chkconfig --levels 235 fail2ban on
2) Configuring fail2ban
Fail2ban configuration files can be found in the /etc/fail2ban directory. The default configuration is in jail.conf file. Take a look and you see it is not hard to understand! You can see [default] section at the beginning of the configuration file. You can override the settings below.
Here's explanations for the settings:
* ignoreip: This is a space-separated list of IP addresses that cannot be blocked by fail2ban. For example, if the computer from which you're connecting to the server has a static IP address, you might want to list it here.
* bantime: Time in seconds that a host is blocked if it was caught by fail2ban (600 seconds = 10 minutes).
* maxretry: Max. number of failed login attempts before a host is blocked by fail2ban.
* filter: Refers to the appropriate filter file in /etc/fail2ban/filter.d.
* action: Refers to the appropriate action file in /etc/fail2ban/action.d.
* logpath: The log file that fail2ban checks for failed login attempts.
Make sure to replace the email address you@mail.com with your own email address so that you get notified when someone gets blocked by fail2ban.
After you have edited your configuration to the way you want it, restart your fail2ban and you're good to go!
Fail2ban logs to /var/log/fail2ban.log, so you can check that file to find out if/what hosts got blocked. If a host got blocked by fail2ban, it looks like this:
2008-08-08 17:49:09,466 fail2ban.actions: WARNING [sshd] Ban 1.2.3.4
2008-08-08 18:08:33,213 fail2ban.actions: WARNING [sshd] Ban 1.2.3.4
You can also check your firewall to see if any hosts are currently blocked. Simply run
iptables -L
For services that use TCPWrappers to block hosts, take a look at /etc/hosts.deny.
Fail2ban is basically a tool that observers all login attempts to your server thru various services, like SSH, HTTPD, FTP, Telnet (oh god, no telnet, please!). If it finds failed login attempt many times in a row from the same IP / host, it blocks that IP / host with an iptables firewall rule. Handy piece of software, I say!
We're going to configure fail2ban to monitor SSH server, because I'm not using any other open service in my linux server. If you're using proftpd or some else server that requires authentication, it is quite easy to implement the changes to those servers, too!
1) Install fail2ban
Easiest way to install fail2ban is to use yum. As I have said before, it is easy to use yum and you win a lots of time when using it. If you know exactly what you're doing, go ahead and compile your own applications!
yum install fail2ban
Start fail2ban and create system startup links:
/etc/init.d/fail2ban start
chkconfig --levels 235 fail2ban on
2) Configuring fail2ban
Fail2ban configuration files can be found in the /etc/fail2ban directory. The default configuration is in jail.conf file. Take a look and you see it is not hard to understand! You can see [default] section at the beginning of the configuration file. You can override the settings below.
Here's explanations for the settings:
* ignoreip: This is a space-separated list of IP addresses that cannot be blocked by fail2ban. For example, if the computer from which you're connecting to the server has a static IP address, you might want to list it here.
* bantime: Time in seconds that a host is blocked if it was caught by fail2ban (600 seconds = 10 minutes).
* maxretry: Max. number of failed login attempts before a host is blocked by fail2ban.
* filter: Refers to the appropriate filter file in /etc/fail2ban/filter.d.
* action: Refers to the appropriate action file in /etc/fail2ban/action.d.
* logpath: The log file that fail2ban checks for failed login attempts.
Make sure to replace the email address you@mail.com with your own email address so that you get notified when someone gets blocked by fail2ban.
After you have edited your configuration to the way you want it, restart your fail2ban and you're good to go!
Fail2ban logs to /var/log/fail2ban.log, so you can check that file to find out if/what hosts got blocked. If a host got blocked by fail2ban, it looks like this:
2008-08-08 17:49:09,466 fail2ban.actions: WARNING [sshd] Ban 1.2.3.4
2008-08-08 18:08:33,213 fail2ban.actions: WARNING [sshd] Ban 1.2.3.4
You can also check your firewall to see if any hosts are currently blocked. Simply run
iptables -L
For services that use TCPWrappers to block hosts, take a look at /etc/hosts.deny.
How to install Lighttpd with PHP and MySQL to Fedora Core
Lighttpd, or light, is a fast, light and secure webserver which is designed and optimized for speed-critical environments. Many huge websites (Youtube, Wikipedia for example) use lighttpd to serve static content. Also many sites that get more than thousand hits / second use lighty.
Compared to Apache HTTPD or nginx, Lighttpd is not as fust as nginx but it is easier to configure and implement. Compared to Apache, it is faster but has less options. You have to consider which httpd server to use. I personally love to use Apache because of its modules, but I wouldn't hesitate to change to lighty!
1) Install MySQL
First thing you need to do - if you don't allready have MySQL installed - is to install MySQL.
You can do this any way you want, but the easiest way is to use YUM:
yum install mysql mysql-server
Make sure you start mysqld. You should also make sure your mysqld starts when your linux starts up:
chkconfig --levels 235 mysqld on
/etc/init.d/mysqld start
I personally install mysql server from binaries but this is the easiest and fastest way to get your mysql server up and running.
When you install your mysql server, there is no password set for mysql root user. Unless you're using some virtual linux running on your personal laptop used only for developing things, change this immediatelly!
mysqladmin -u root password newpassword
Installing Lighttpd
Since we're using Fedora and we're able to use Yum to install applications, we install lighty this way:
yum install lighttpd
Next, start up your lighty and make sure it starts up when restarting your linux server:
chkconfig --levels 235 lighttpd on
/etc/init.d/lighttpd start
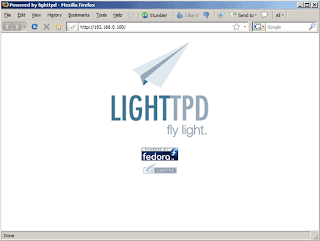
You can now test your ligty. Go to http://127.0.0.1 and you should get a page like this:
3) Install PHP
Lighttpd can use FastCGI to render PHP pages. This can be also installed with YUM:
yum install lighttpd-fastcgi php-cli
That's it! Restart your lighty and you're all good to go!
Compared to Apache HTTPD or nginx, Lighttpd is not as fust as nginx but it is easier to configure and implement. Compared to Apache, it is faster but has less options. You have to consider which httpd server to use. I personally love to use Apache because of its modules, but I wouldn't hesitate to change to lighty!
1) Install MySQL
First thing you need to do - if you don't allready have MySQL installed - is to install MySQL.
You can do this any way you want, but the easiest way is to use YUM:
yum install mysql mysql-server
Make sure you start mysqld. You should also make sure your mysqld starts when your linux starts up:
chkconfig --levels 235 mysqld on
/etc/init.d/mysqld start
I personally install mysql server from binaries but this is the easiest and fastest way to get your mysql server up and running.
When you install your mysql server, there is no password set for mysql root user. Unless you're using some virtual linux running on your personal laptop used only for developing things, change this immediatelly!
mysqladmin -u root password newpassword
Installing Lighttpd
Since we're using Fedora and we're able to use Yum to install applications, we install lighty this way:
yum install lighttpd
Next, start up your lighty and make sure it starts up when restarting your linux server:
chkconfig --levels 235 lighttpd on
/etc/init.d/lighttpd start
You can now test your ligty. Go to http://127.0.0.1 and you should get a page like this:

3) Install PHP
Lighttpd can use FastCGI to render PHP pages. This can be also installed with YUM:
yum install lighttpd-fastcgi php-cli
That's it! Restart your lighty and you're all good to go!
Subscribe to:
Posts (Atom)

